DDR Pad Trouble Shooting Guide
Listed below are some common conditions and solutions I have discovered that will remedy the situation. Bear in mind that these are general suggestions and they will work for most metal DDR pads.
Just to state a general disclaimer, you are ultimately responsible for your own solution and I accept no responsibility for any damages that occur as a result of following the outlined steps.
| General Issues | ||
|---|---|---|
| Issue | Stuck or Shorted Tile | Non-Responsive Tile |
| Short Description | Tile stays active after you step on it. You will notice rapid selections in the game whether or not you are on the tile or not. | The tile does not register an action if you step on it or only works intermittantly. |
| Possible Causes | ||
| Possible Solutions | ||
Stuck or Shorted Button
Indication:
This problem can present itself in a number of fashions. The most common symptom will be a rapid continuous movement in the menus of the game without the action stopping. An example of this would be on the song selecting screen and have the game continuously scroll through the song selection carousel.
Another instance would be rapid selection of options without any intervention on behalf of the player. The game might immediately start, go to a mode, and select a song at the default difficulty and begin playing (This usually happens if you have a sticky corner button like the "x" or "o"). Sometimes it might not be as apparent when it first manifests itself and you might notice a significantly higher calorie count for songs in work out mode where the game thinks that you are continuously hitting a certain button.
Half of the battle here will be diagnosing which button is stuck. If a song or mode is being rapidly selected without your intervention chances are that the "x" tile is stuck. If you are continuously cycling through the music selection carousel, menus, or the difficulty settings on a song chances are that you have a sticky directional button.
To determine which one is stuck you can observe which direction the cursor or selection is rotating. Try hitting the opposite arrow and see if the rotation halts for a split second or so. For example of the carousel is scrolling to the right you might want to be sure the right arrow key is stuck by stepping on the left arrow.
Causes:
This problem occurs in two different flavors.
The contact is dirty. In this case the reflective, conductive, silver tape on the bottom of the plexi-glass, directional arrow tiles have rubbed off onto the contacts underneath from friction. The debris from the tap will accumulate on the two contact plates underneath the plexi glass arrow tile. This will hit a point where it bridges the gaps from one contact plate to the other creating a short.
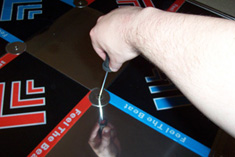
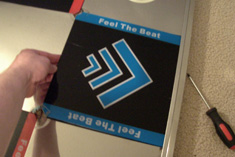
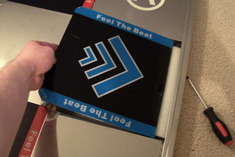
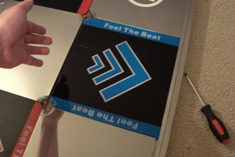
Remove The Tile:
In most DDR pads you will notice that around the central neutral square, usually a metallic rigid tile (This is the one where most beginning DDR players stand before they learn you can stand on the other arrow without penalty), that there are four screws that have a washer around their neck. To loosen the tile you will need to loosen the two screws that are touching the sides of the tile. This task can be completed with a Phillips head screw driver.
Once these are loosened they can be lifted out of their holes. This will free up one side of the arrow tile. At this point you will notice that the tile can be pulled away from the outer edge of the Metal Pad (The one edge usually rests underneath the lip of the outer encasing). Pull the arrow towards the center and then lift up to remove the tile. This will have to be done very carefully if you have led lights that flash under the arrows because the wire for the lights will still be connected to the tile.
Remove the screws and washers anchoring the arrow tile to the central square. For the side arrows there will be two screws and the corners will only have one holding it in place.

Once the screws and washers have been removed, gently lift the tile up and pull it toward the center of the pad to clear the lip of the outer metal frame. You will be able to see the contact plat as the tile is being removed.
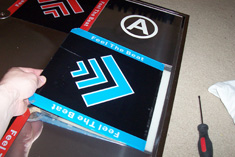
After the tiles edge has cleared the lip of the metal frame, you can safely lift the arrow away from its compartment. Watch out if your DDR pad has led lights because the arrow tile will have a wired attached to it.
Once the tile is removed you will be able to see both contact plates underneath the tile. You will notice some gummy grey substance with metallic fragments on top of it on the contact plates and in between the metal tracks of each plate. This is the portion of the metallic conductive tape under the tile that has worn off and shorted out the arrow. You will also see more of a build up near the center and probably be able to visually see where the tape residue shorted out the two plates.
Correcting the issue for Case 1:
You will need to clean both the conductive contacts and the reflective tape underneath the arrow. I recommend using a cloth and some isopropyl rubbing alcohol. Chances are that the rags will be hard to clean after the ordeal so I recommend saving old pairs of socks for this task. These are slated for the trash anyway and make awesome cleaning rags.
Place a good amount of alcohol on the rag it should be somewhat damp in a single area. Now just clean off the black debris from the reflective tap on the underside of the tile. This could take a couple of passes to get it clean. Next rub at the grime on the contact plates – this can be done safely while the pad is still powered up, in case you encounter this issue while in the middle of a game. Once the grime is off you might have to use the head of a small flathead screw driver to gently scrape the metallic fragments from in between the two contact plates. These have a habit of sticking and won't come off easily with the rag.
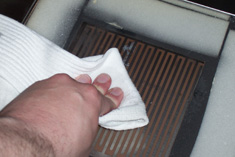
Begin the process by wetting a rag with alcohol and rubbing away the debris from the contact plate. Wipe along the direction of the tracks of the contact plate.
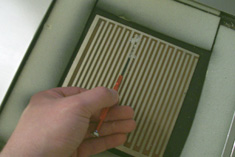
Even after cleaning the pad with the rag you will still have some metal fragments remaining on the contact plate. Use a flathead screw driver to gently scrap these away.
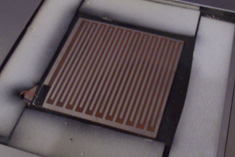
The metal fragments released from the screw driver scrapping can be lifted away with the rag. Here is what the contact plate looks like once it has been cleaned.
After the cleaning, gently place the Plexiglas arrow tile back over the contact plates. You will have to slide a portion of the arrow underneath the outer metal lip to get it to fall into the space properly. Finally let go of the tile and let it rest into the proper area.
Before you place the support screws and washers back in you will want to tests the arrow to make sure it is working and the problem has been resolved. If you haven't already done so, hook up the DDR pad to your game system and then load a DDR game. Carefully stand on the pad and navigate through the game menus to see if the issue is still present. Tap on the arrow a couple of times. Does the arrow press register and does it cease when you remove your foot from the tile. (If the problem persists you may have an issue where the arrow rests on the contact plates all the time instead of hovering above them. In this case the issue is likely due to the sponge-like insulation around the arrow wearing out. )
Start by lowering the tile into place, sliding the side back under the lip of the metal frame.
Once the tile is under the lip of the outter frame, start to lower the tile back into its space.
With the tile in place you can reattach the washers and screws.
The final step in this is placing the screws and washers back on the pad securing the arrow into place. First grab a washer and make sure it is on the screw before lowering the screw into the appropriate place. Securely fasten the screw in place with the screw driver and make sure it is snug but not over tighten because you run the risk of stripping the screw's head. Repeat this process for the remaining screw and washer to finish reassembling the pad.
The insulating foam around the perimeter of the arrow tile has lost it elasticity. In this case the spongy material no longer elevates the conductive arrow underside above the contact plates. This causes the arrow to always rest on the plates and become a short. I've only had this happen once and it was on one of the metallic corner tiles and not an arrow tile.
Chances are that you have already removed the tile anticipating a dirty contact if you encounter one of these issues because the symptoms are the same as a dirty contact. You will find that cleaning the contact will not alleviate the problem and the arrow still remains stuck. If you are at this stage you can jump directly to the solution section and skip the disassembling portion of the tiles.
Removing The Tile:
First you must remove the affected tile. This involves taking your screwdriver and carefully removing the central bolts and washers that hold the common contact places of the arrows in place. If you are dealing with a corner tile you only need to remove a single screw and washer. If the tile is one of the directional side tiles you will need to remove two adjacent screws.
Once the Support screws and washers have been removed you should be able to gently lift the tile away from the compartment. As you lift gently, start to slide the tile toward the center to make sure the outer portion of the tile clears the lip of the outer metal frame. If the tile in question is a metal corner tile to will have to lift up at the corner to lift it off of the wooden frame underneath before you start to move it. Don't life it too far and gently start to pull it toward the center of the metal pad so that the metal tile can slide away from the lip of the outer metal frame. Take extra caution on arrows that have LEDs attached that you do not pull too hard and damage the connecting wires.
Correcting the issue for Case 2:
Once the tile is off you will be able to see which side or sides of the surrounding insulation have been worn down or don't retain the sponge-like quality. If you have extra foam insulation lying around the house you can simply cut some extra and place it on top of the existing insulation. Make sure that the thickness is not too great; you only need the arrow to hover over the contact plates a couple of centimeters.
If you are like me and do not have any thin strips of insulation lying around the house you can always use a paper towel. I recommend a two ply paper towel because of its extra girth. Simply fold the paper towel length wise a couple of times and place that over the existing insulation. It sounds silly but it works like a charm. Just be warned that you keep the added insulation off the contact plates otherwise it might inhibit the accuracy of the arrow tile.
After this has been completed, take extra care as you place the arrow tile back in place. Turn on the power to the console and connect the DDR pad if you haven't already done so. Load up the game and carefully test out the arrow tile to make sure it doesn't stick. When you are sure it works replace the screws with the washers being careful not over tighten.
I had to do this on my corner tile or "X" button. It works extremely well and has not given me any trouble since.
Non-responsive tile
Indication:
This is another of those issues that becomes more apparent if you are an avid player. You will be playing through a song and suddenly you get boo-ed on steps that you clearly hit the arrow at the right time. This will usually happen with the same steps and the white border of the on screen hit indicator arrows will not flash as it normally does when you step on the arrow. This can also present itself when you are trying to make a selection and the action won't register or you have to step on the tile a certain way to get it to take.
The issue here is that the contact plates are dirty. In the same way where the conductive tape underneath the plexi glass arrow can wear away accumulating on the contact plate to make a short it can also obstruct the circuit.
The first thing you will need to do is discover the arrow which is giving you troubles. If you are playing a song and you get boo-ed on a bunch of steps that are timed correctly. All you have to do is notice which arrow is causing you to loose steps. This is the easiest way to discover a non-responsive arrow. If you are trying to switch songs what direction arrow are you stepping on that isn't allowing you to complete an action. Diagnosing the inflicted button is easy in this circumstance too.
Removing the Tile:
The next step is to remove the tile. First remove the washers and screws adjacent to the tile at the center of the pad. Side tiles are held in place by two screws and the corner tiles are held by a single screw. Gently life the side of the tile up from its compartment and start to pull the tile toward the center as you continue lifting to clear the lip of the outer metal frame. Use caution if you have LED lights on your tile so you won't place any stress on the attached wire.
Now that the tile is removed you will be able to see the section where the contact plates is obstructed. There will be a conglomeration of tape residue as well as metallic fragments on the contact plates. Take a rag and wet it with isopropyl alcohol. Now gently wipe away the debris on the contact plates and also wipe any accumulated dirt off of the conductive tape on the underside of the arrow tile.
Any debris that is located between the tracks of the contact plate should also be removed at this time. Most of this will come off with the rag and alcohol; however, you might find some troublesome fragments, namely the metallic flakes that will not come off so easily. In this case take a small flathead screw driver and gently scrape away the fragments with the head of the driver. Be extra careful if the fragments are on the tracks themselves. To avoid unnecessary scratching you might want to wrap the head of the screw drive in a small piece of rag or paper towel.
The area should dry almost immediately. Now place the tile back in its place. Power on the console and connect up the DDR metal pad if you haven't already done so. Begin a game and carefully test out the button with some navigation or a short slow song. The button should be responsive again. Re-attach the screws and washers that you had removed, being careful not to over tighten.