My Solo Project - Snow Plow Final Assembly Phase
Assembly Stage
The final stage of this project is attaching all of the completed pieces of the truck together. This step is the most challenging simply because the metal shapes shift when the holes are drilled. If you manage to keep the shapes stationary after drilling a hole, they still might shift when you lift up the parts to get a nut on the bolts to attach it.
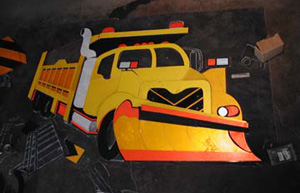
An image of the truck thus far before I began attaching the shaspes together with bolts. The back wheels are complete at this point but just not attached yet.
My approach was to start from the snowplow blade section and work my way around to different sections of the truck. This way misalignment was minimal if you worked from the most critical contact points out to the less precise shapes. I also minimized movement by placing bolts through holes as they were drilled just to keep the pieces from shifting.
I continued drilling the other holes without the pieces shifting too much. Once I had an area finished, I carefully lifted the pieces and loosely placed a nut on the bolts to hold it steady. The undercarriage was able to be attached with a small amount of bolts because the numerous pieces were already joined in many places with pop rivets.
I had the frontal section of the truck attached into one single and it was time to add the window shapes. I lifted up the edge and carefully slid the large silver portion, composing the windows and windshield collectively, underneath. Once the silver window panel was in place, I unfastened a couple bolts and drilled through the existing holes and down through the silver piece.
The silver piece was then attached with two spacers to recede it an inch below the lemon yellow section. This created a cast shadow onto the silver, giving it the depth found in glass automobile windows.
Tightening up the seams
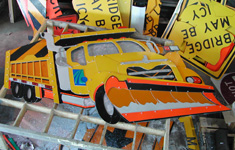
Persistence was the name of the game and eventually I had the truck together into a single unit. The time had come to tighten up the bolts so that the completed form would be more rigid. A few concerns were apparent at this point: the truck was on a concrete floor and the metal structure itself was very heavy. Because of these reasons, I found it difficult to tighten some of the bolts and there was no easy way of getting underneath of it. At this point I needed to transport the cumbersome snowplow to the table.
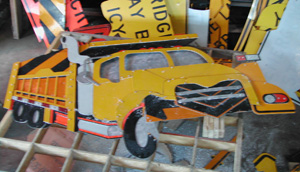
I had to muscle the truck onto the table by myself to tighten the bolts and also attach the recessed silver shape for the windows. You will also notice that most of teh other sections have been attached. I choose to leave the plow off the front because of the considerable weight of the structure.
The table we use for these projects does not have a solid opaque top. The top is comprised of 2 x 4's which are interlaced into a lattice with hollow square holes about a foot in diameter. This lattice supports the structure, but allows one to climb under the table and have easy access to bolts which are under a hundred pounds of metal.
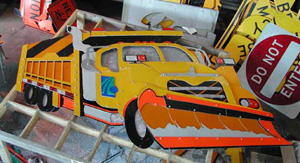
The nuts on the bolts were not tightened completely, but were sturdy enough to transport the truck onto this wooden table. I had to do this by myself. This is one of the times where a team would have been beneficial but I persevered and managed to wrestle it onto the table. Once it was on the table, I tightened each of the bolts, inserting a couple extra bolts in places where the points of contact seemed a bit weak. At this time, I also attached the snowplow blade onto the truck.
Customization
With the truck in one piece, I found myself significantly ahead of schedule. This gave me some time to customize it with the extras I had discussed with the client. These extras included the enhanced bulldog hood ornament, the Penn DOT logo, and some snow on the plow blade.
Penn dot Logo
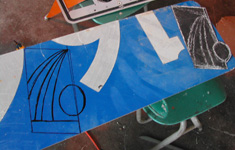
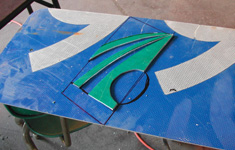
The Penn DOT logo is mostly blue and green, so the next decision to make was what color to use for the underlying structural portion for the logo. I decided to choose blue as the underlying layer since it comprised most of the logo. The green shapes were cut separately to be attached on top of this blue layer.
The finished logo was attached to the yellow door with the aid of pop rivets. Pop rivets can penetrate and join up to four layers of metal. This saved on the number of pop rivets used since a single layer of pop rivets can connect the green logo shapes to the blue logo layer and then connect those directly to the truck's door.